
By Jasmina Susak • Updated on April 03, 2026 • Includes links to FREE tools
In this blog, I want to show you the tools I use to help with my drawing and painting processes. The tools listed here are completely FREE, require no registration, have no usage limitations, and do not place a watermark on downloaded images.
Table of contents
The tools I use and recommend in this blog do not use AI technology at all. I’m not against AI – what’s more, I’m a huge fan of technology – but when using AI tools, they upload our images to servers, analyze them, probably train their models with them, and then the AI regenerates them before sending them back to us. And then we end up with slightly distorted proportions, and we could not control the output, the amount of editing, etc. Also, I don’t want anyone to analyze and share my reference photos, because sometimes I purchase them from photographers, and I just can’t, and I don’t want to upload their photos to AI servers.
The tools from this blog are designed for those who still want to do some manual, traditional editing. They work in any browser, on any device, without servers; there’s nothing to download, install, or subscribe to. Just interactive, simple, and easy-to-use old-school tools with manual sliders and buttons for full control.
How to Create a Proportional Sketch from a Reference Photo
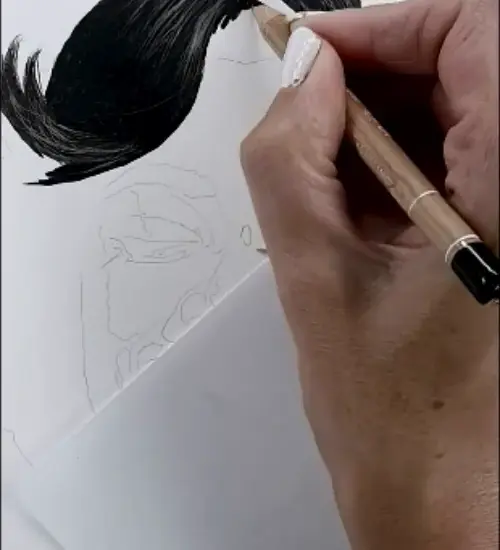
When drawing from a reference photo, we want to create an accurate and proportional sketch before we start shading or coloring. Many artists trace their outlines, but in my case, it is not possible because I use thick Bristol pads for drawing and can’t see much through them. I also often draw on toned paper, and I can’t see anything through it. This is why the grid method should be used.
The Grid Method
The grid method, simply explained: we place a digital grid over our reference photo and draw a grid with the same number of columns and rows on our paper or canvas. Then we transfer outlines from each cell of the reference photo to the corresponding cells on our paper. The denser the grid, the more accurate our sketch will be. Then we erase the gridlines and start coloring over the proportionally accurate sketch.
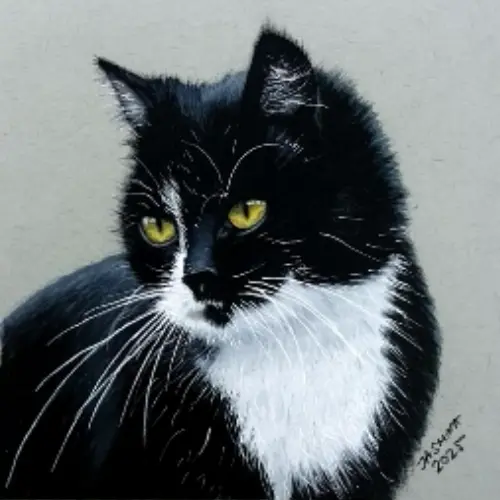
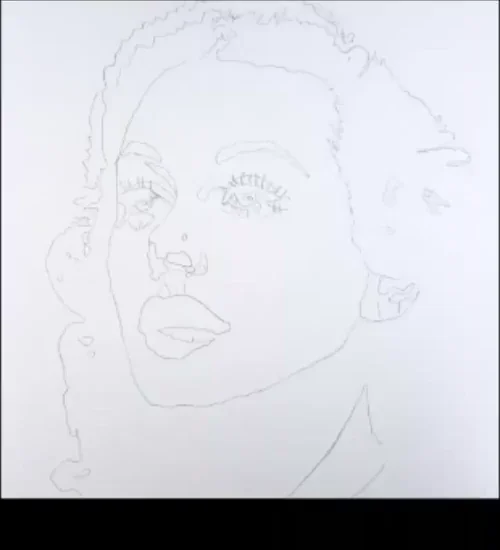
In this video, you can see me drawing a Tuxedo cat on Strathmore Toned Gray. You can see how I first drew the grid, then transferred the main outlines from my reference photo, erased the grid lines, and colored with colored pencils.
Instead of drawing grid lines over your reference photo, you can just place them digitally. To add grid over my photos, I use the Add Grid to Image Online Free Tool from FreeToolio.

Why this Grid Maker from FreeToolio is better than others:
- It lets you customize grid line color, thickness, and opacity
- You can opt for perfect squares (a 1:1 ratio)
- You can save ONLY the grid! I haven’t found this option anywhere else
- You can make grid templates
- You can make printable dotted pages
- You can upload/download an unlimited number of images
- The tool doesn’t reduce the size and quality of your image.
- It’s free, fast, easy to use, and secure.
In the screenshot below, you can see the User Interface of Grid Maker, with all the options available to customize and download images, with or without a grid overlay.

These tools from FreeToolio won’t send your pictures to any servers. They are completely secure and private. Your images never leave your device.
Tip: How to check if FreeToolio or any other website is not receiving your images:
- Load the website completely
- Turn off your Wi-Fi or disconnect your internet
- Upload your image to the tool
- If the website is receiving your photos and doesn’t really want to easily admit it, the loading will last forever, and you won’t be able to use the tool. If they are nice, you will see something like “Internet connection required.”
- If the website – like FreeToolio – has tools that work in your browser and don’t need to be processed by servers, you’ll be able to upload, edit, and download your images without any problems – even OFFLINE.
Convert photo to Sketch
If you don’t like sketching and just want to quickly jump to coloring, or you struggle to draw a sketch with pencil, you can just turn your reference photo into a pencil sketch with the tool I also use, Photo to Sketch Converter Online Free from FreeToolio.

How to Customize Sketch Lines
How to Make Sketch Lines Lighter
Once you have created sketch lines, you can customize them further and prepare them for coloring and shading.
When my pencil lines are too dark, I upload my sketch to the free Reduce Image Opacity Online tool and reduce the opacity of my image. This way, the lines become lighter and less visible under my colored pencils. It is also useful if you paint digitally and want to add one more layer to your artwork.

How to Create a Sketch for Toned Paper
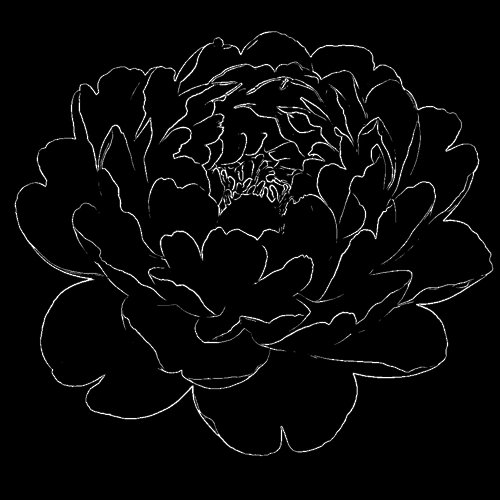
The next thing I often do is to create my sketches for toned paper. When I want to draw on black paper but don’t have any at home, I just invert my pencil lines on white paper, so they appear as a negative: white pencil lines on black paper.
I use the Invert Images Online Free Tool from FreeToolio to invert my images.
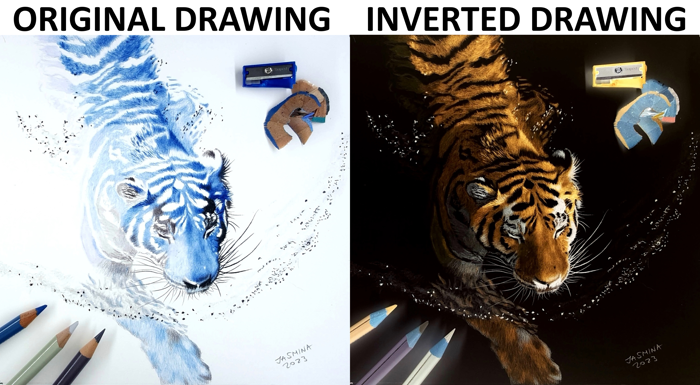
I also often use the Invert Images Online Free Tool to invert the whole reference photo, draw what I see, and then I invert my finished drawing. This is very interesting. We can learn so much about values and hues and how to apply them. So, I recommend everyone to try drawing in negative. I have tutorials on it on the Colored Pencil Tutor website.
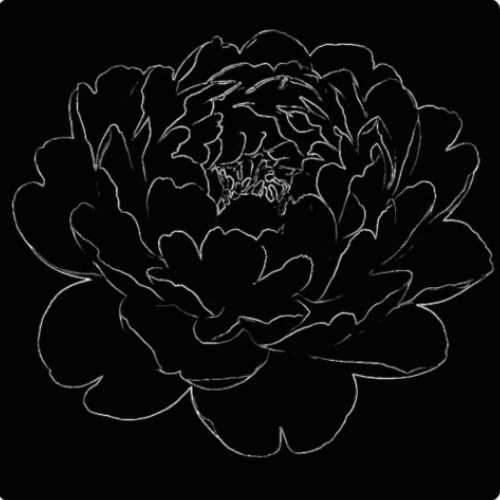
To make your sketch on gray paper, you can either reduce opacity with the tool I already mentioned, Reduce Image Opacity where the black background will become lighter and lighter (gray) as you move the slider, or use Brighten or Darken Image Online Free Tool and increase the brightness of your inverted sketch (see screen record below). With this tool, you can also highlight and darken only the parts of the image with interactive brushes that work similarly to Dodge and Burn brushes in Photoshop.
To create sketches on toned paper, you can also use the Paint Bucket Tool to fill the background with color around the art lines. It can be any shade of gray, but also blue, green, whichever color you choose from the color picker next to the tool. This way, you can create toned paper for yourself, such as Pastelmat, Strathmore Toned Gray or Tan, or any other paper by popular brands. Then you have a perfectly proportional sketch on your favorite background color; it’s time to print it on high-quality paper and color it.

How to Shade and Paint the Artwork Correctly for Realism
How to Find the Right Shade for Graphite and Charcoal Drawings
When I draw with graphite pencils from a reference photo, I always analyze it to make sure I shade the areas correctly. Sometimes, midtones seem to have equal value as the highlighted shadow, or you think that the tip of the nose is equally illuminated as the cheek. But our eyes cannot easily distinguish these difeferences and you realize you didn’t choose the right pencils.
To make sure I shade correctly, I posterize my reference images to map out values, to break them into flat levels of values.
Here is a visual example of how I drew the portrait of Hedy Lamar (photo in public domain). I posterized it into 7 levels using the Posterize Image Online Free Tool from Freetoolio. The tool automatically displays even colorful photos as black and white and lets you choose the number of levels with an interactive slider.
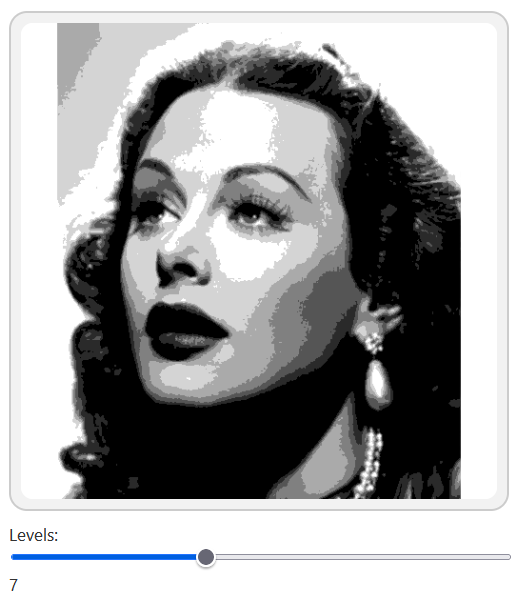
For this drawing, I used Prismacolor Premier colored pencils: Black and Cool Grays. Cool Gray is the same colored pencil, manufactured in 6 different values: 90%, 70%, 50%, 30%, 20%, 10%. These are great for shading gradients. As you can see in my time-lapse drawing below, I started with the darkest areas and colored them all with a black colored pencil, pressing very hard. These wax-based colored pencils are highly archival, can completely cover the paper, and are easy to blend. Then I skipped the white parts in my posterized reference photo and started coloring the second lightest levels with Cool Gray 10%, then continued towards the dark shades, level by level. I also blended the edges between these values with the same pencils. It can be done with graphite pencils, too.
How to Find the Right Colors for Drawing and Painting
When I draw with colored pencils, posterizing doesn’t really map out the color levels nicely. That’s why I use the Color Value Finder free tool. This tool basically does the same as posterizing, but it works with color levels. It works similarly to the Cutout effect in Photoshop but is more calibrated for artists.
The Color Value Finder tool is also used by oil and acrylic painters when they prepare for underpainting. Underpainting means they need to paint simple, flat areas of color, and then they blend them and add details on top. This tool helps them map out their reference photo easily with one click.
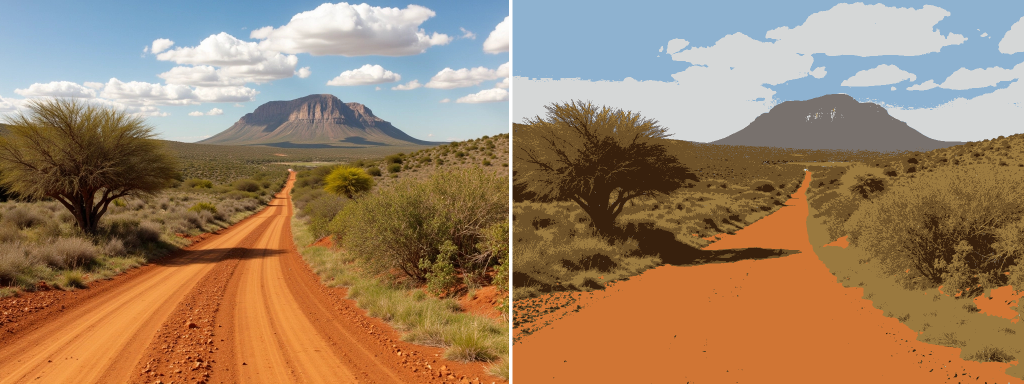
In the image below, you can see the landscape reference photo on the left, and the same photo mapped out with 7 levels chosen in the Color Value Finder tool on the right.
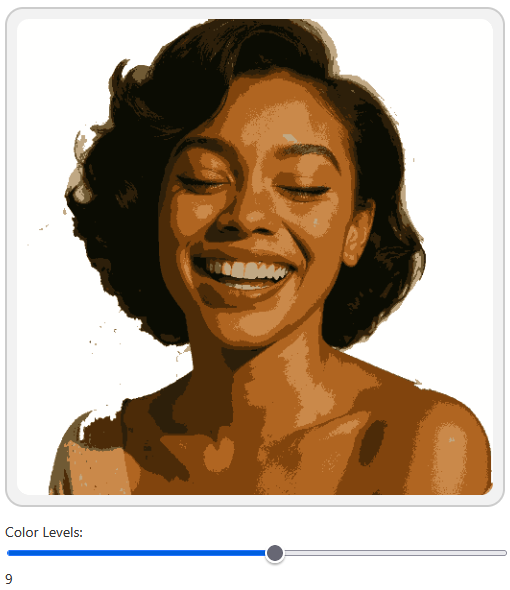
I used the Color Value Finder tool to see the color values for this reference photo of a laughing girl. I applied 9 levels.
To find out which colored pencils to use, I use PenPick, but it is a paid, subscription-based web application. Since I want this blog to be about FREE tools, I won’t go into detail here, but I have written a separate blog post about it: How to Choose the Right Colored Pencils for your Drawings.
Then I used Caran d’Ache Luminance colored pencils because they manufacture Burnt Ochre in 3 different values, which is great for coloring different values of the same hue. For the highlighted areas, I used Burnt Ochre 10% and blended it with a white colored pencil. I blended all the levels using the same pencils, layering one over another for a flawlessly smooth gradation and to make these tones flow flawlessly into each other.
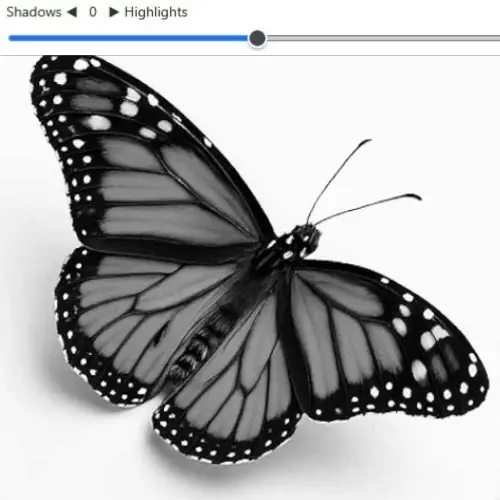
How to Find the Brightest Highlights and Deepest Shadows
When I draw with colored or graphite pencils from a reference photo, I often find myself wondering: Where exactly are the deepest shadows? Am I over-shading the midtones? Are all of my highlights equally bright? Even after more than a decade of experience, it is very hard to figure this out just by looking at a photo.
That is when I use the Highlight & Shadow Isolator. This tool allows you to analyze the layers of an image to see the values.
- Finding Shadows: As you move the slider to the left, the tool gradually brightens the image from the light areas down to the darks, until only the absolute deepest shadows are visible.
- Finding Highlights: When you move the slider to the right, the tool begins blacking out the image from the dark areas up to the lights. This reveals the brightest highlights last.
Not all highlights are equal! Some are soft reflections, while others are the brightest spots (often absolutely white). This tool reveals those differences instantly, so you know exactly where to leave the paper white and where to add a light tone.
Summary of Free Tools for Artists
Below are the tools I covered in this blog, along with a few extra tools that you might find useful for your own projects:


